Friday, October 30, 2009

i heart pumpkin


Fall is officially here (can't believe Thanksgiving is only weeks away) and lately I've had pumpkin on the brain -- dreaming of pumpkin pie topped with pumpkin ice cream...or maybe just eating them separately.  Either way pumpkin is just sooo delicious. My personal favorite fall-time treat is the pumpkin ice cream at Mitchell's. Or, you can make your own -- came across this recipe for pumpkin pie ice cream that sounds really good!

Photos: via Christie's Corner

Wednesday, October 28, 2009

burrito in my belly


I probably eat at Papalote (at least) once a week -- basically whenever I'm feeling too lazy to cook...which usually happens around mid-week (i.e. today).   

Insanely good burritos, tacos -- the list goes on.  This place is a must for visiters and locals alike...if you haven't eaten here PLEASE check it out!

Monday, October 26, 2009

beez kneezzz


Love this collection of salt boxes by Bee House!

Photos: via Zensuke

Sunday, October 25, 2009

moroccan spice


Came across this recipe for a moroccan-style marinade.  It was so good -- I decided to use it twice!

Recipe --
3/4 cup olive oil
3/4 cup red wine vinegar
2 tbl fresh ginger, minced
1 tbl garlic, minced
1 1/2 tsp salt
1 tsp ground cinnamon
1 tsp coriander
1 tsp paprika
1 tsp sugar
1/2 tsp ground cumin
1/2 tsp ground black pepper
1/4 tsp cayenne

To prepare, whisk all ingredients together.  

I used half to marinate cubed lamb (2 hours or so) -- which I skewered.  This would be great on flank steak as well!  The other half I brushed on assorted vegetables (reserve any left-over marinade): eggplant, bell peppers, zucchini and onion.  Using a cast iron grill pan, I grilled each of the vegetables, until tender.  Once cool enough to handle -- I diced into 1 inch pieces and tossed with reserved marinade, toasted pine nuts, mint and salt & pepper.


While the vegetables were cooling, I grilled the lamb skewers until caramelized on the outside, but still pink in the center (med to med-rare).  I served the lamb skewers over quinoa that I seasoned with lemon juice, lemon zest, olive oil, cumin, fresh mint (minced) and salt & pepper -- and garnished the dish with a sprig of mint.


I really enjoyed both of these dishes -- and the combination of the two together.  Give it a try and let me know what you think!

Recipe: Sunset

Saturday, October 24, 2009

taco night

 
I love taco night!!  It's by far my favorite weeknight staple.  As I'd mentioned, I wanted to try using the chipotle salsa as a marinade or sauce of sorts.  I incorporated about 1 1/2  cups of the salsa with 2 cloves of minced garlic and a couple tbl of olive oil -- added the mixture to a bag with roughly 1 lb. of chicken breast and marinated for an hour or so.  I then added the chicken and 1/3 cup of the marinade to a saute pan and cooked, covered, on medium-high heat until chicken was mostly cooked through.  I ended up shredding the chicken and adding it back to the pan with the sauce and simmering a few more minutes, uncovered, to allow the sauce to reduce and coat the chicken.  


I served the chicken on flour tortillas with shredded romaine lettuce, green onion, cilantro, avacado, sour cream, a bit more chipotle salsa and a lime wedge!  We devoured every bite!

Thursday, October 22, 2009

ad hoch


A friend emailed me today asking if I'd checked out Ad Hoch at Home -- the newest cookbook from Chef Thomas Keller based on recipes from his casual Yountville, CA eatery -- which I hadn't!  This book is definitely making it's way onto my Christmas list... 

You can read a review here.

Photos: by Paula Forbes via Eat Me Daily

local foods wheel


I'm always trying to plan meals that incorporate ingredients that are both seasonal and (whenever possible) locally grown.  I recently stumbled upon the local foods wheel -- currently available for SF and NYC -- which helps identify what foods are grown in the region, and what's in season at various times of the year. I'm thinking this could definitely come in handy!

Wednesday, October 21, 2009

remix


I ended up with a lot of extra cheese filling and tomato sauce from the ravioli -- and decided to use them to make this super-easy manicotti. It's always so gratifying to make good use of left-overs!

I got the idea to use no-boil lasagna noodles from Cooks Illustrated -- they hold up so much better than boiled pasta and you don't have the mess of trying to pipe in the filling.  

Simply pour boiling water into a shallow baking dish, add noodles (in a single layer -- careful they will want to stick together) and soak for roughly 5 min, just until they soften and become pliable.  Then spread filling on the bottom 3/4 of noodle and roll.  Fill the bottom of a baking dish with about 1 1/2 cups of the tomato sauce and add rolled manicotti (seam side down).  Top with more sauce, cover with foil and bake at 375 degrees for 40 min (or until bubbling).   Remove foil, top with grated parmesan and place under broiler for 4-6 min -- until cheese is spotty brown.


I served the manicotti with a classic cheesy garlic bread...Mmmm...so good.


Recipe--
1 loaf rustic Italian bread
9-10 cloves of garlic, whole, peel on
6 tbl unsalted butter, softened
1/2 tsp salt
4 tbl parmesan cheese
8 oz mozzarella cheese

Preheat oven to 375 degrees.  Meanwhile, toast garlic cloves in a small saute pan over medium heat, tossing occasionally, until fragrant (about 8 min). Once cool enough to handle, peel and mince garlic cloves and combine with butter, salt and 2 tbl parmesan -- using a fork to mash.  Cut bread in half lengthwise and spread cut sides with butter mixture.  Place loaf back together and wrap with foil.  Bake in oven for 10 min.  Remove from oven and discard foil.  Preheat broiler. Sprinkle cut sides with mozzarella and remaining 2 tbl parmesan.  Place under broiler until cheese is bubbling and browned in spots.
 

i know how to cook


Love these illustrations by Blexbolex for I Know How to Cook, the classic french home cooking book, by Ginette Mathiot.

Photos: by Blexbolex for I Know How to Cook via Design*Sponge

Tuesday, October 20, 2009

pasta pasta

 
I've finally put together a pasta-making tutorial (as promised)!  I really wanted to share this because making fresh pasta is one of my very favorite things --- maybe I'm just wacky, but I find it sort of therapeutic...

Before diving into the how-to, I need to start with the pasta machine.  I use the Marcato Atlas150 -- this is a really great model (used in professional kitchens) -- you can purchase one on Amazon for around $80. I bought it a few months ago and have gotten a lot of use out of it...totally worth it! 

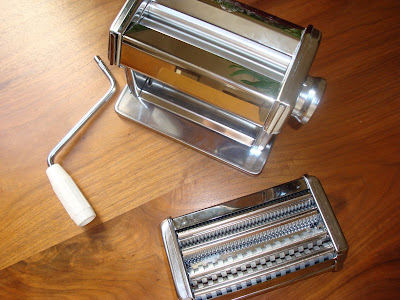
Recipe for pasta dough --
3 cups bread flour
5 eggs
1 tbl salt
semolina flour, as needed

To start out, measure the flour and salt onto a clean work surface -- a wood chop block works great (if you're lucky enough to have one) -- and mix together.  I'd advise having a metal bench scraper handy.  Crack eggs into a bowl.  Make a well in the center of the flour + salt and slowly pour in 3 eggs (pooled eggs will naturally separate from one another).  With your hands, incorporate eggs into the flour (you will be very sticky and gooey at this point).  Reform well and add 2 remaining eggs - incorporate.

Wash hands to remove any large globs and bring dough together to form a ball.  If needed, wash hands again. Flour work surface with semolina flour and knead dough until it starts to develop a gluten structure (this takes roughly 10 minutes) -- the dough should look a bit shinny when it has been kneaded adequately.  Cover dough with plastic wrap and rest -- 10-15 min.  Dough is ready to roll!

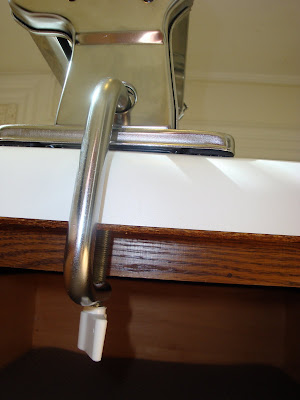
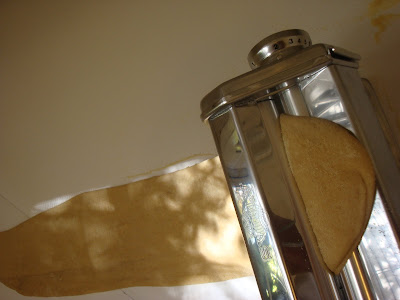
Set up pasta machine on a stable work table -- using clamp to fasten.
  

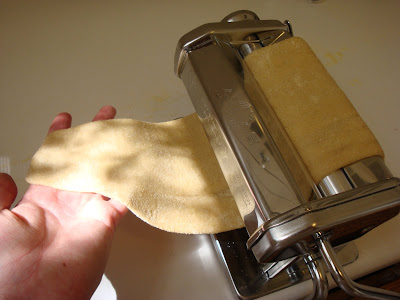
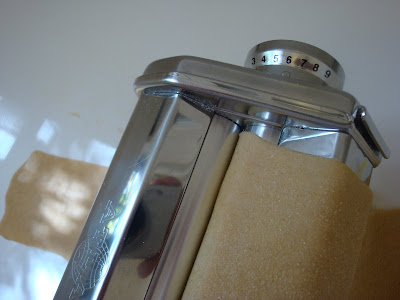
It is easiest to work with roughly 1/2 of the dough at a time.  Begin by setting the dial to 1.  Flatten out dough (so it's around half the width of the roller) and flour with the semolina (don't be afraid to use lots of semolina!). Position end of dough in center of roller. With one hand, support the back end of the dough, guiding it so that it stays straight as it enters the roller -- stop periodically to stretch out the flattened dough as it comes through the other end.  Repeat these steps, increasing the dial by one each roll -- you will go all the way up to setting "6".


Tip: If the pasta becomes too long and difficult to handle, cut in half and work sections individually...this usually happens around setting "3".  Just be sure to remember where you left off...

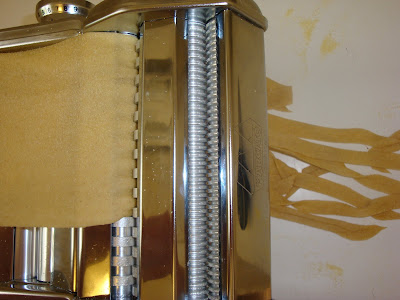
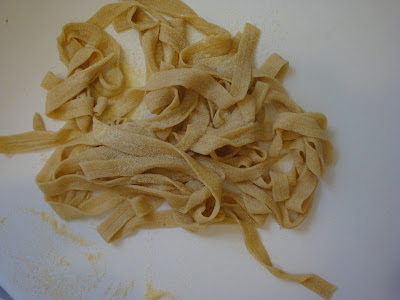
If you want to make pasta noodles, fasten attachment and roll sheet through chosen setting (depends on the width of the noodle you want).  Toss cut noodles with the semolina to keep from sticking together and cover with plastic until ready to boil -- they will dry out quickly.


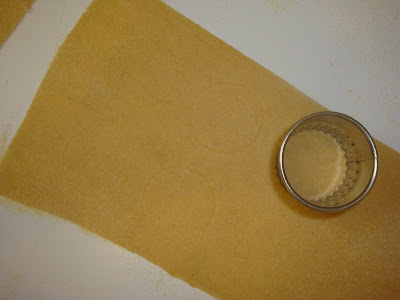
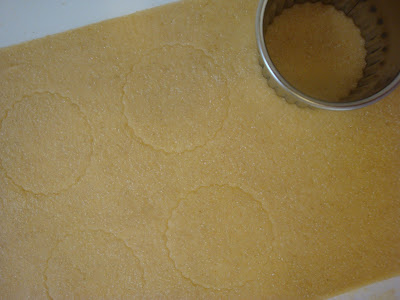
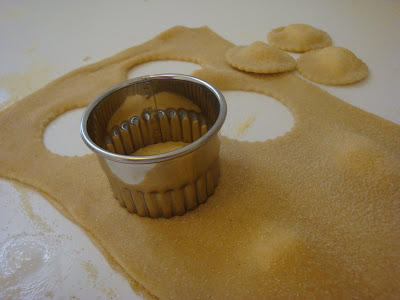
For ravioli you'll need 2 sheets of rolled out pasta, approximately the same length and width.  You'll also need to have round or square cutters on hand. Flour work surface with semolina and lay out one sheet of pasta.

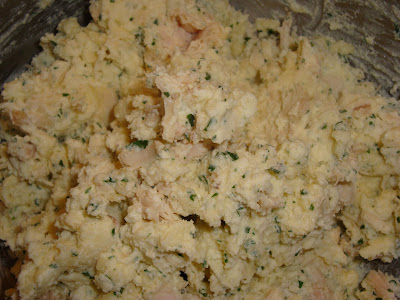
Recipe for three cheese filling --
1 1/2 cups ricotta cheese
1/2 cup parmesan cheese
1 cup mozzarella, shredded
1 egg, lightly beaten
1/2 tsp salt
1/4 tsp black pepper
1 tbl fresh parsley, chopped
1 tbl fresh basil, chopped

 
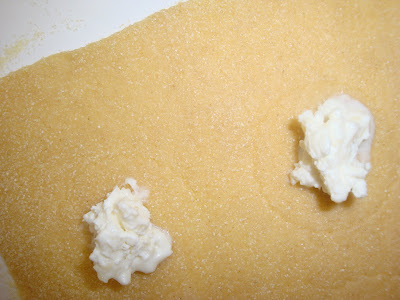
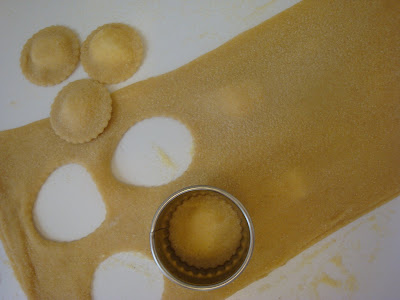
Before adding the filling, I like to use a cutter to "mark" where each ravioli will be.  Mound a small amount of filling in center of each marked ravioli.  Lightly dab water around the filling (this will help the sheets stick) and drape the second sheet of pasta over the filling.  Working with one mound at a time, use finger tips to press sheets and seal -- being careful not to lock in any air bubbles.  Cut each ravioli with your selected cutter and toss with the semolina flour.


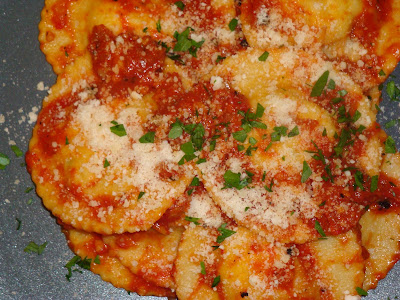
Fresh pasta cooks really quickly -- 2-3 min for the noodles and 4-5 min for ravioli -- and it's much lighter than dry pasta. 

 
Toss cooked pasta with the roasted tomato sauce, parmesan & fresh parsley -- it would be great with pesto as well -- and serve.  Enjoy!